Hello everyone, my name is Roman Bloemke, President of the Hutchinson Photography Club.
When we set out to build the new website, one of the things that we wanted to accomplish was more interaction through our blog page. We’ve thought of a few different things that we’d like to share, but would love to hear the type of things you’d like to see us write about. If you have any ideas, please leave a comment at the bottom of this post.
One of the ideas that we had running through our heads was a feature called “How I Got the Shot”. This feature will have one of our members walk through an image they took and talk about how they got the final image.
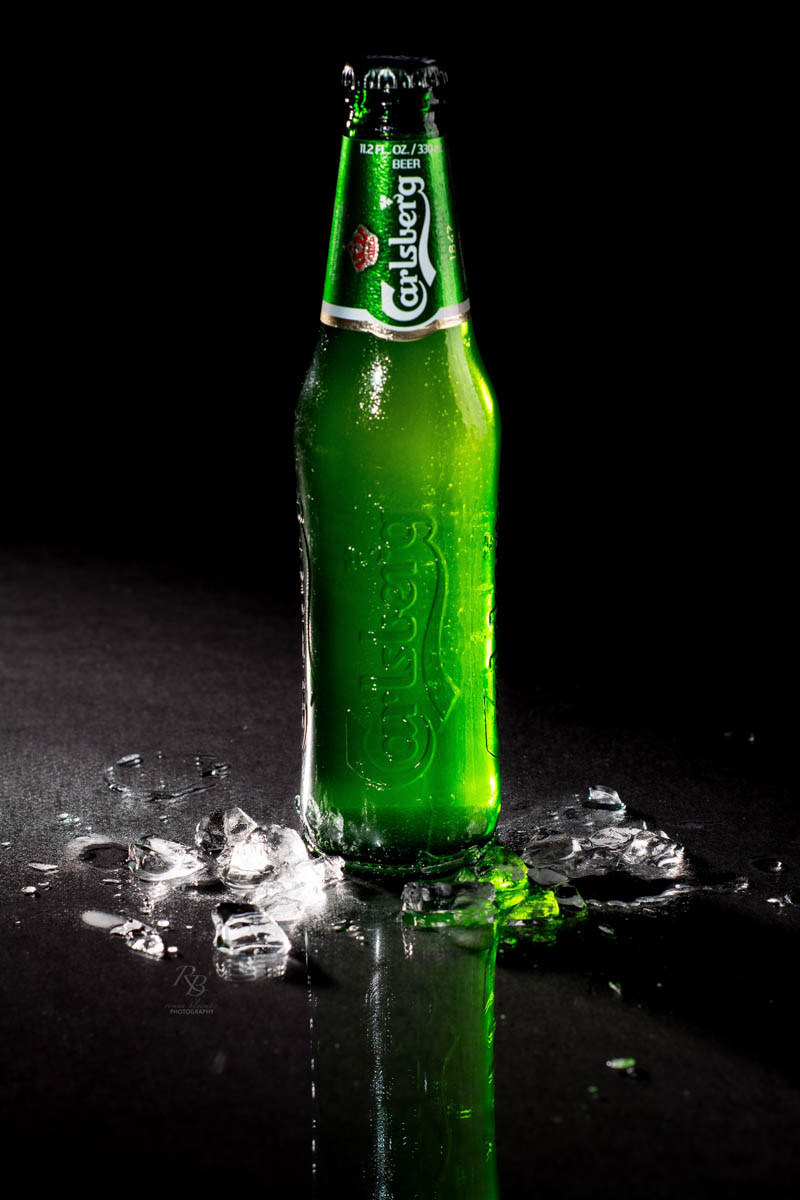
This month, we are going to look at one of my images. This image was our club’s monthly theme winner for the title of “Cold”.
When presented with this challenge, I really wanted to think outside of the box and challenge my thought process a little bit. I wanted to put some thought in to this one.
First things first. I believe this would have been a much easier session, had I used a light meter. The club has one, but I didn’t have time to run and get it.
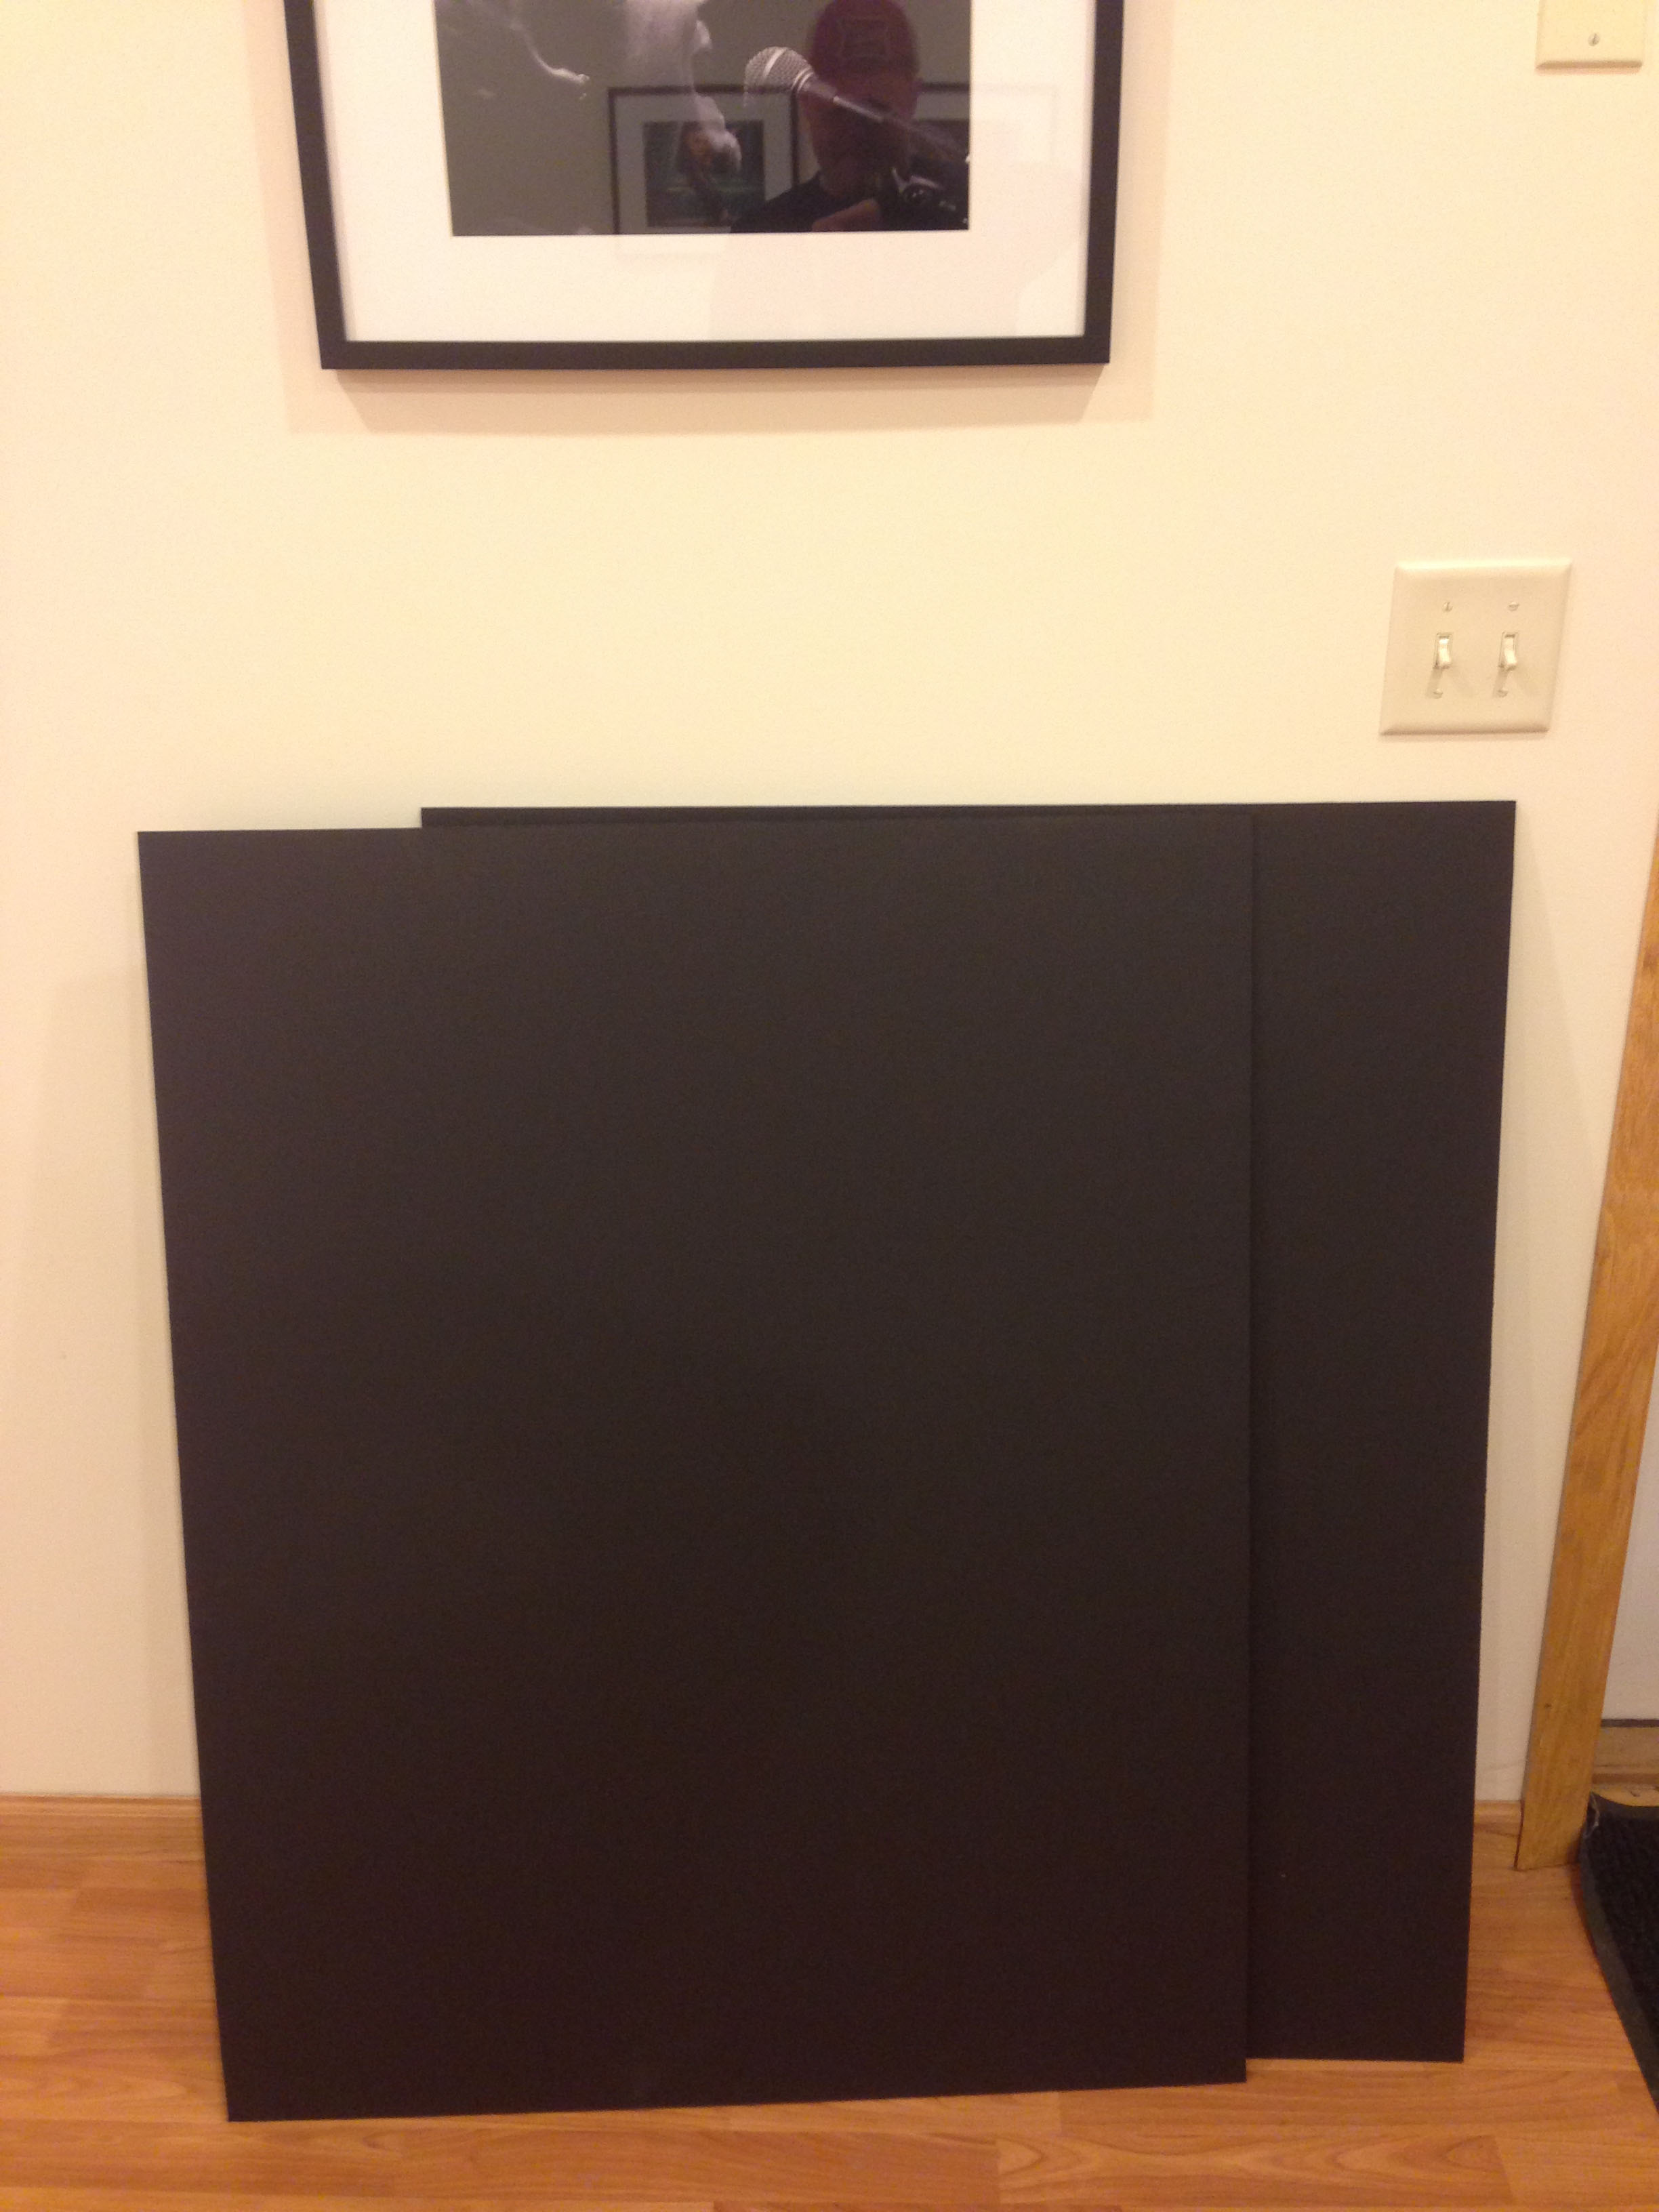
When deciding to set up this shot, I knew I wanted a black background and foreground. My first thought was to find some black plexiglass. That search turned out to be much harder than I had thought. I needed a somewhat shiny background to shoot on. I searched for black tile, again I came up short. I called around to a couple of local sign companies to see if they had anything that would meet what I was looking for. Nothing was working. Just before I gave up, I asked a friend of mine if he had any black matte board. I’m glad he did, because I was about ready to go shoot some landscape images for the challenge.
With the black matte board in hand, I just needed a reflective source. I went to Runnings and picked up a piece of clear plexiglass.
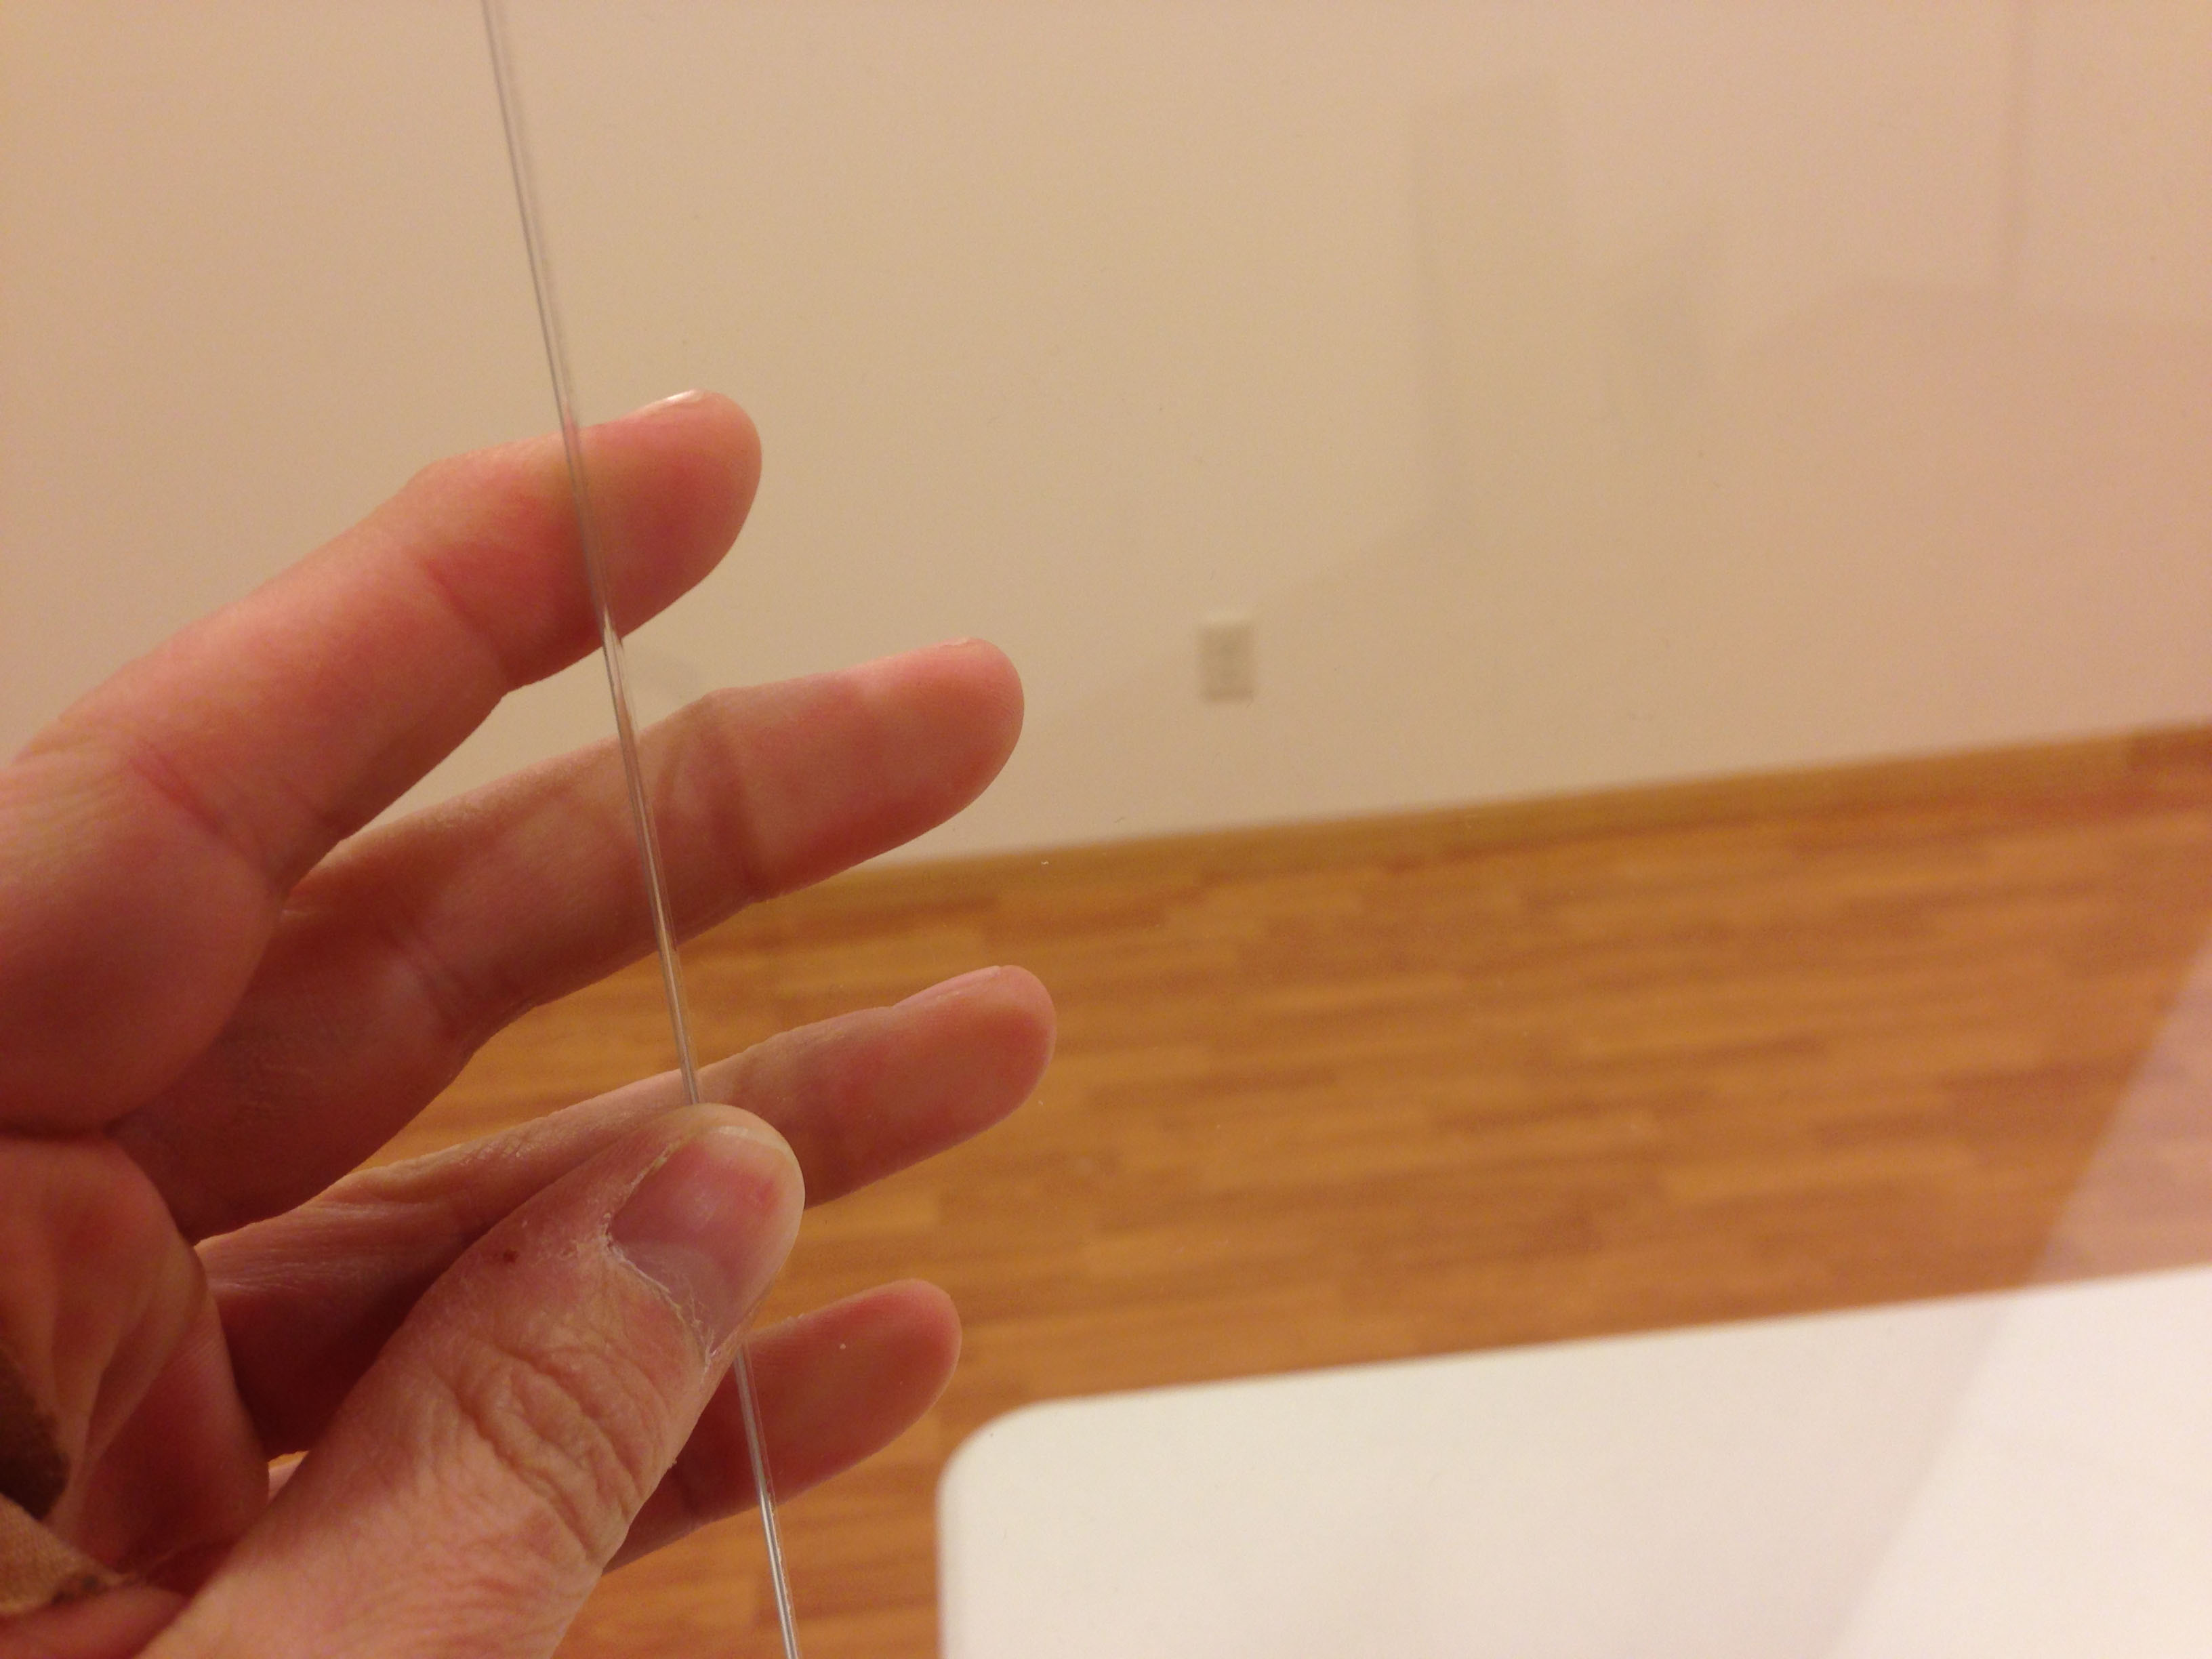
Laying that on top of the black matte board did the trick.
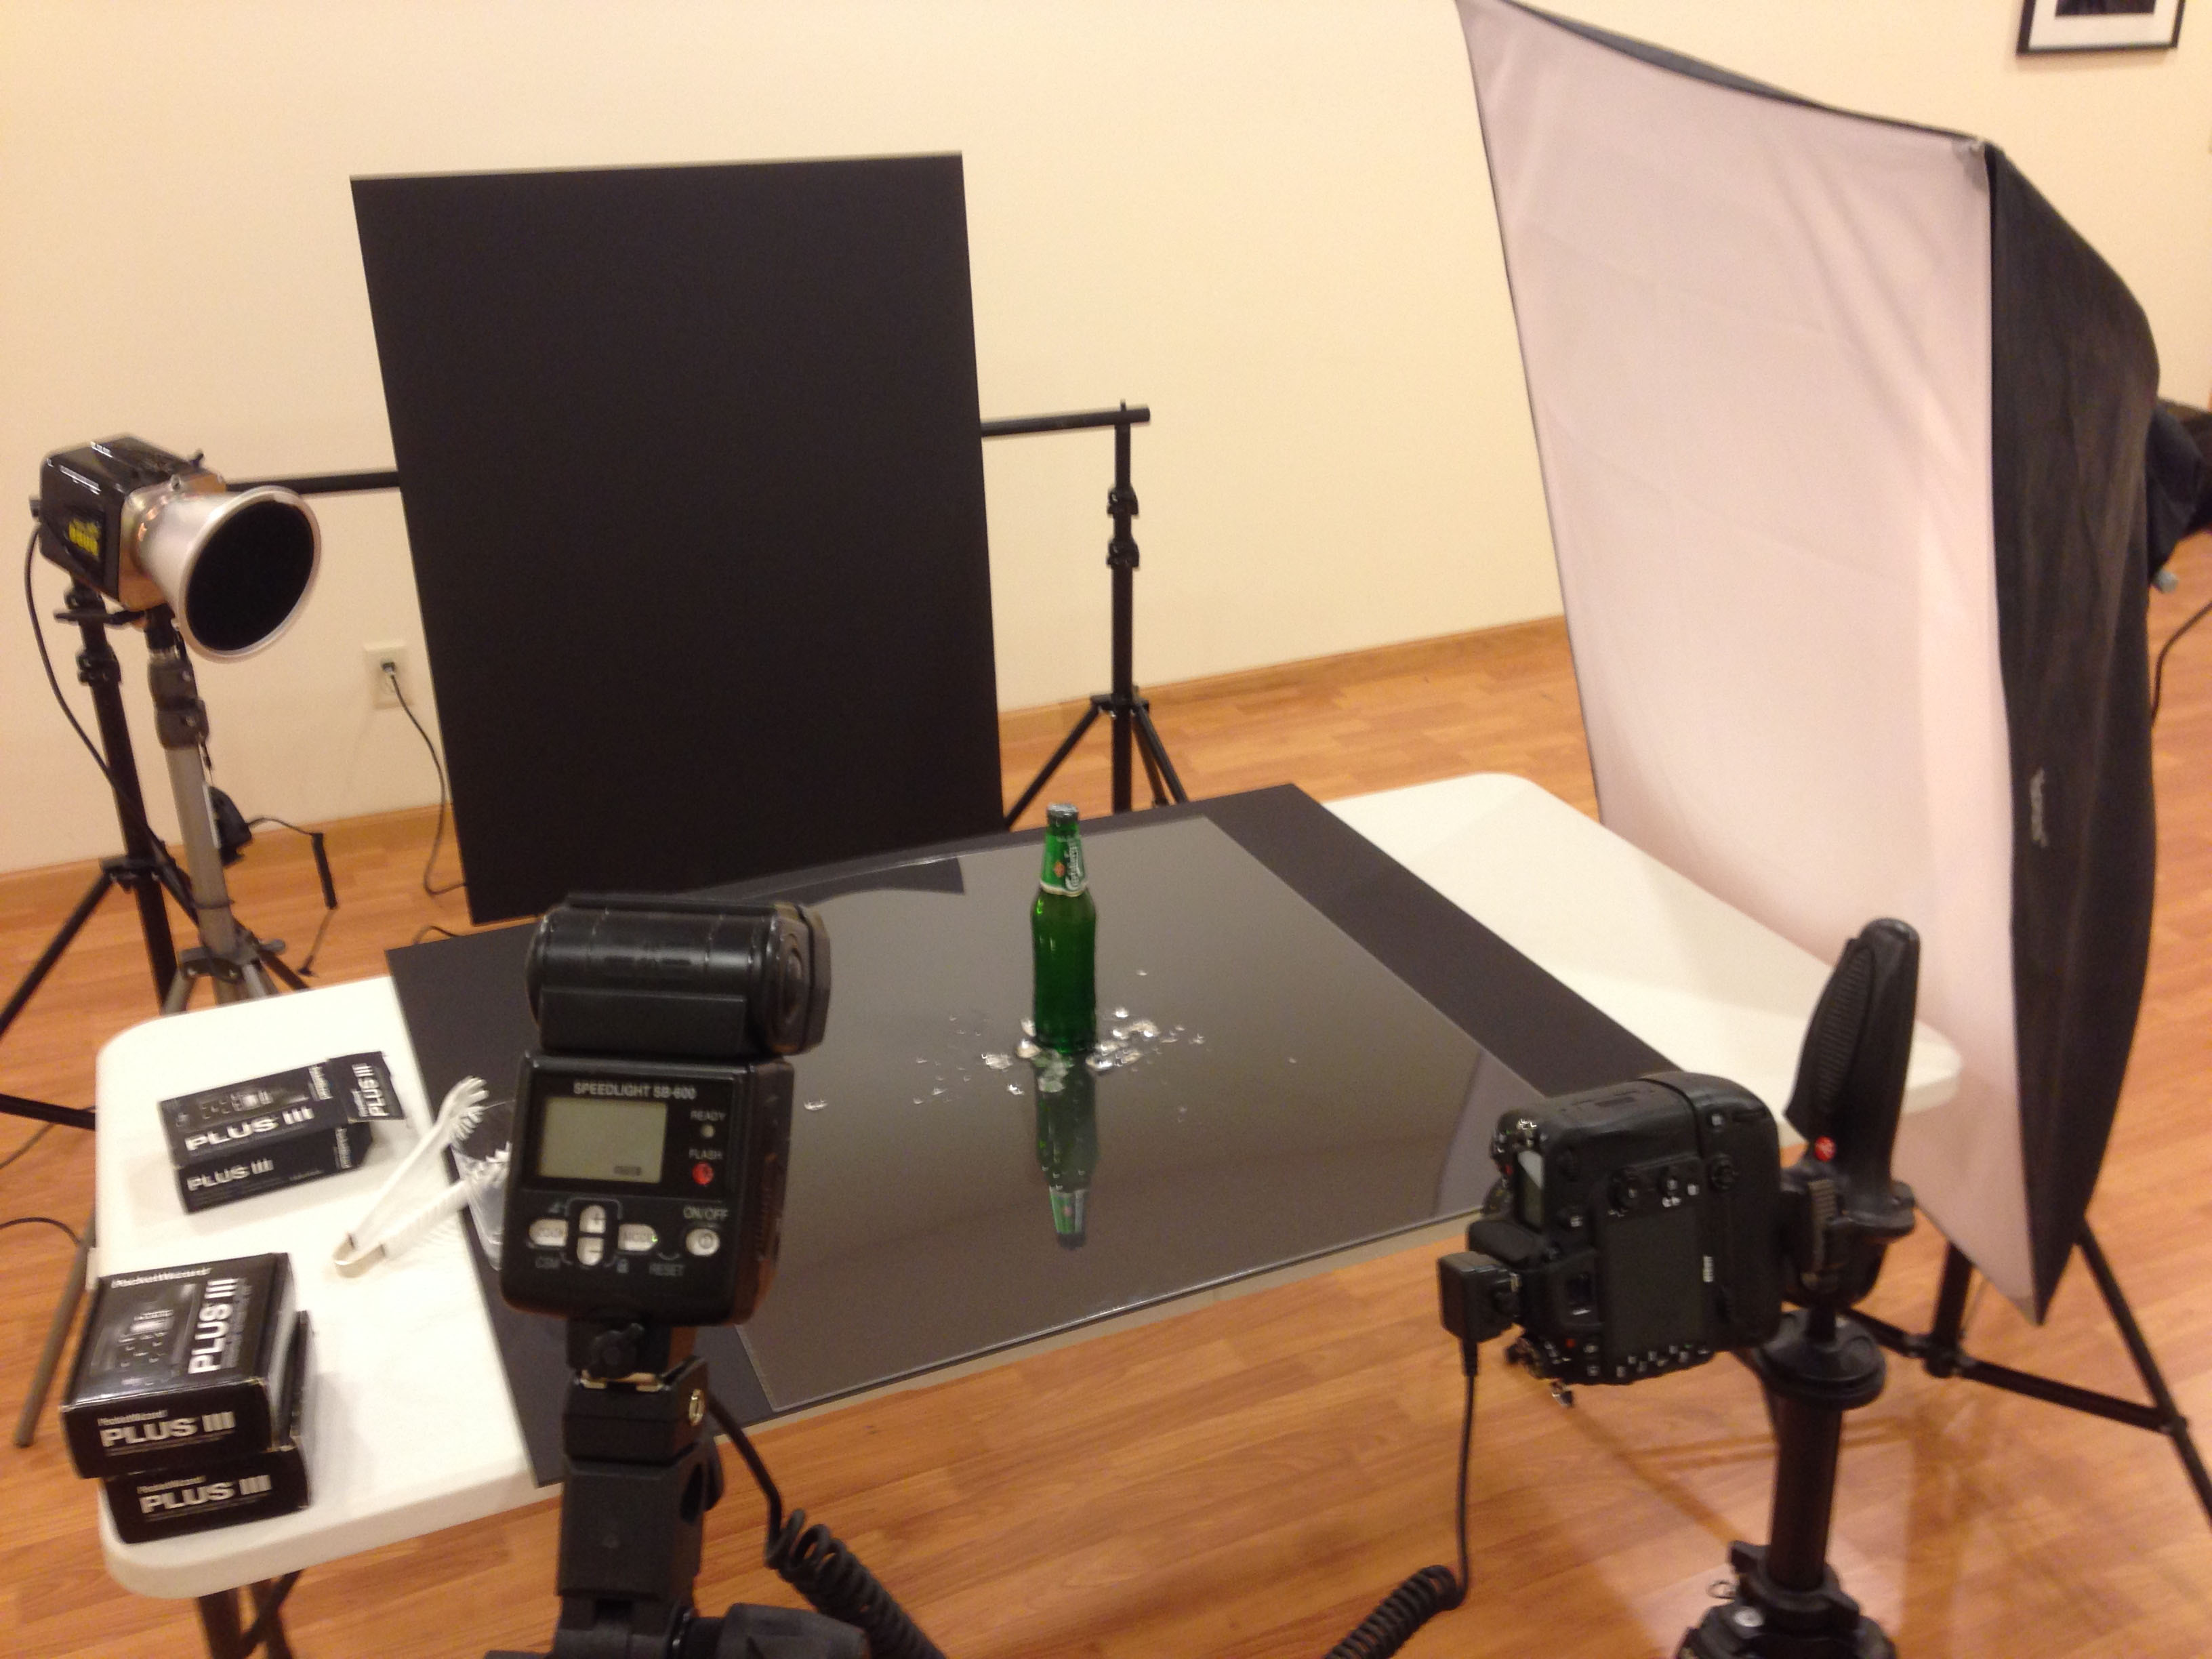
The next part was the layout for the lighting. As I mentioned above, the whole set up would probably have taken less time had I owned a light meter (next on the wish list!). I played around with the lighting set up quite a bit. I’ll walk through a bit of it in the photo below.
 Here you can see the two pieces of matte board and the plexiglass layout. As a side note, I took the image above after the shoot was complete. It wasn’t until after I shot the final image that I remembered to do a blog post on the session.
The first light I added, was the Alien Bee 400 with the softbox to the right of the bottle. That would provide the edge light and separation that I wanted from the matte board behind the bottle. By having the soft box up close, I could light the bottle, but wouldn’t have any dark shadows to contend with. It also softened the light up considerably.
The second light I added was the Alien Bee 400 on the back-left side. I added the 20 percent grid to the light to control where the light fell on the bottle. I only wanted this light to highlight the bottle. Through this process, I moved this light around a lot until I got it just where I wanted it. Using the modeling lamp on the 400, I was able to angle the light so that it just caught the top half of the bottle.
I took many shots with this set up. As you’ll see in the photo below, it wasn’t until I added the third light, just to the left of the camera, that I finally was able to light everything up the way I had wanted.

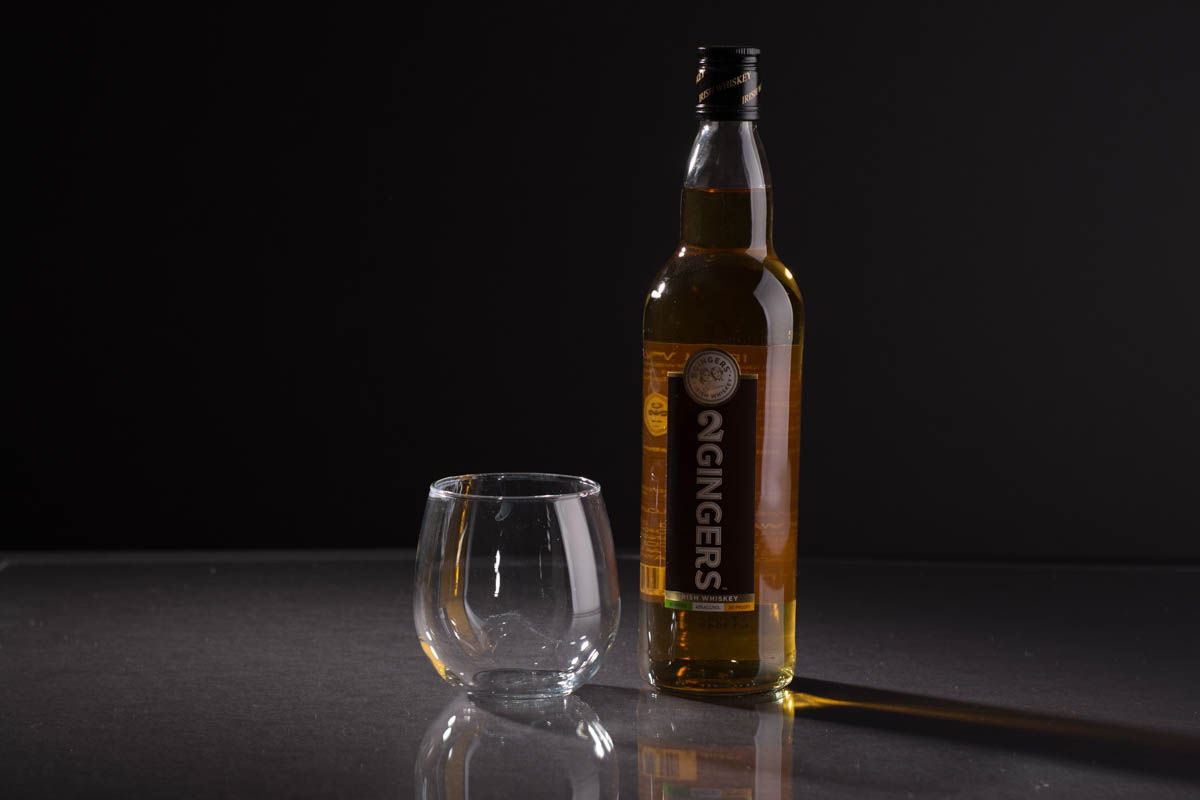
I was originally starting with the 3 Gingers bottle and glass. That’s why you see these instead of the green bottle.
In the image above, this shows the first light with the softbox coming from the right of the bottle.
In the image above, it is just the AlienBee from the back right turned on. Flash from the right with the softbox is turned off so you can see the angle of it a bit.

The next step was to add the ice in to the set up. I just took a cup full of ice, put it in a bag and crushed it with a rolling pin. From there I just laid it out by hand.
While the image above works, it wasn’t exactly what I was going for. I really wanted to use the green bottle instead.
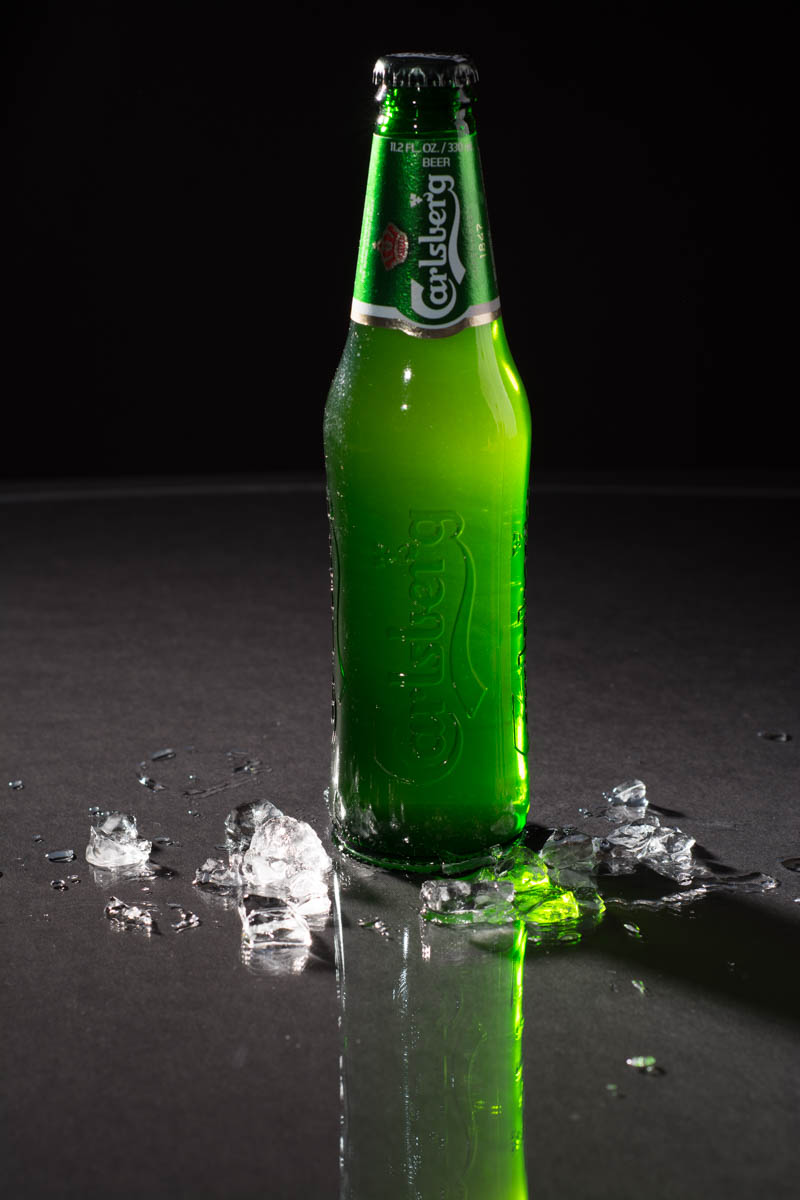
Since I wasn’t completely happy, I quickly switched out the 3 Gingers bottle with the bottle of Carlsberg. The green bottle really helped this jump off of the screen.
The last thing I needed to add before pressing the shutter button, was to give the bottle that look of just “coming out of the cooler”. I accomplished that by using a small bottle of eyeglass cleaner and spraying it directly on the bottle. The bottle was at room temperature throughout the session, so I needed that last boost to make it look cold. I applied a considerable amount to make it look just right.
From here, it was just some technical adjustments and some cloning to do in Photoshop to finish it off.
From the image above, to the finished photo below, I really only did a few modifications. The first was to crop the bottle to the center of the screen. Second, I boosted the contrast up considerably. That made the photo darker and closer to what I had in mind. The third and final step was to clone out the split of foreground and background matte board along the center of the image. I couldn’t get it exactly seamless, so this was the next best option.
My settings and gear list are below:
Gear:
- Nikon D7100
- 50mm f1.8 lens
- Nikon S-600 speedlight
- Trigger cable
- PocketWizard III radio triggers (I used them in the beginning, but didn’t use them in the final shot since I used the SB-600 to trigger the AlienBees)
- AlienBee 800
- AlienBee 400
- Portable backdrop stand
- 3 light stands (various companies)
- Grids from AlienBee
- Softbox
- 2 sheets of black matte board
- 1 sheet of clear plexiglass
- Ice
- Small bottle of eyeglass cleaner
Camera Settings in final shot:
- f6.3
- 1/125 second
- ISO 100
I hope you enjoyed reading the post! Thanks to the photography club members for selecting this image as the theme/challenge winner for the month of January.
Roman Bloemke, Club President